Showing posts with label arts and crafts. Show all posts

Wednesday, July 17, 2013

i like to spray paint.

I love spray paint.  

It comes in an array of colors... you can spray pain just about anything... and the best part??  The results are practically instantaneous.  Love it.

A few months ago I bought several hanging plants to fancy up our backyard a bit... but the plastic pots that they came in were kind of bland.  I didn't want to spend a bunch more money replacing all of the pots... so... in comes spray paint!!! 

I carefully took the plants out of all of their containers so I could prep the pots for painting.  I have no idea what these plants are called... I completely forgot.  I consider it a huge accomplishment that they are all still alive;)

I took the containers to the side of the house and spray painted them one by one... the whole process took about 30 minutes for 6 containers.  I went with a bold lime green that I've used before on some other outdoor projects.  I love this color.

What a difference!!  I love how the green pops!!!  No more bland here.

I think even the chickens like it:)

Now I just need to focus on keeping the plants alive...

Monday, February 18, 2013

for all the card hoarders out there...

One of my resolutions for February was to actually finish some projects.  My card-hoarding project was first on the list.  A long, long time ago I blogged about my card-hoarding issues and my simple solution.  You can read the original post here.

You see, I have a slight card hoarding problem.  I can't seem to throw away my snail mail... it doesn't matter if it's a thank you card, a birthday card, a graduation announcement, baby announcement, wedding invitation... whatever it is, I keep it.  Told you.  Problems.

So.  What to do about this little problem of mine??  Well, before anyone calls the Hoarders show on me... I figured I would attempt to bring some order to my card collecting obsession.


It's a pretty simple solution.  I just decided to punch a couple of holes in all of my cards and put some rings in the top of them all.  I gathered up all of my materials first: a gigantor hole punch (I use the We R Memory Keepers Crop-a-Dile), some fun tags for the front of your cards, laminating sheets (optional), some rings to corral everything together, and then of course, a shit ton of cards.

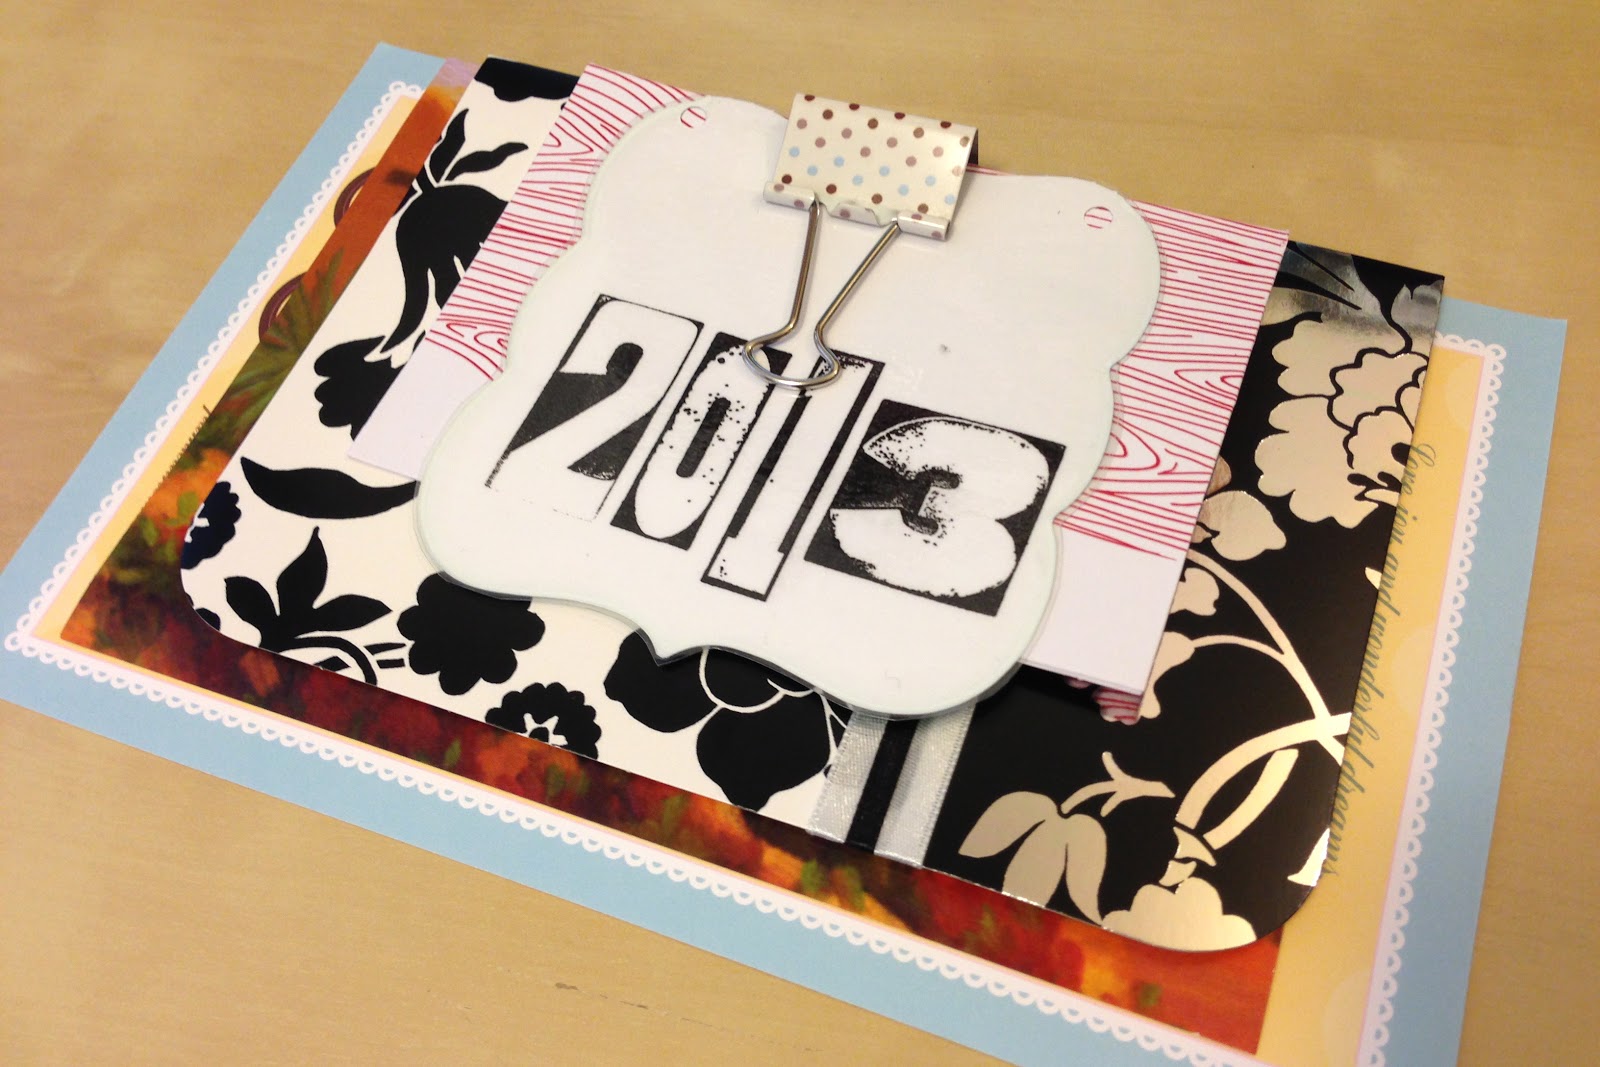
I used my awesome vintage-looking number stamp set to stamp the year on the back of some fun die-cuts.  I love the simple look of these.

After I stamped my die-cut tags, I ran them through my laminating machine.  This is probably not necessary, but I think it will make sure everything holds up for years and years of card hoarding... ahem, I mean memory keeping.

After all of my tags were laminated, I trimmed them down and punched holes in each top corner.  I went ahead and stamped 2 tags for each year that I was catching up on.  I learned early on that there is no way I can fit a year's worth of cards on one set of rings.  I told you guys... I have a crap-ton of cards.  Stop judging me. 

My favorite rings are these mesh cable rings from 7gypsies.  They seem to fit the most cards without getting too bulky.

Here's the finished product.  I love the simple tag with the year stamped on it.  And I love that you can see all of the different cards peeking out from behind.

I love that I can flip through the billions of cards like a book.  For the most part, the cards are in chronological order... so it's almost like a little snapshot of our year... birthday cards... anniversary cards... thank you notes... graduation announcements... wedding invitations... I love it.

And like I said... my card hoarding problem is so out of control that we needed 2 sets per year.  Issues people, I know.

My stack for 2013 is pretty small so far, but I'm adding cards to the pile as they come in.  I'll probably take a day to punch holes in them in a month or so.  I love how accomplished this simple project makes me feel.  While yes, my card hoarding issues continue (and show no signs of early recovery)... this little project makes me feel like the most organized hoarder out there;)

What about you?  Do you keep your snail mail?  What do you do with it?  Are you in the card-hoarders-anonymous group too?  

Wednesday, February 13, 2013

handmade valentine's day

Like I said last week, I'm a big fan of Valentine's day... but I'm also a big fan of handmade.  Combine the two and I'm a super happy camper.  You know what they say... it's from the heart:)

I usually send my nieces a little something for Valentine's day... this typically means a card and some stickers or something like that.  This year I scoured the house to see what I already had on hand.  I found some plain red cards and decided to just stamp a pretty heart on top and emboss it... similar to how I did last year's Christmas gift tags.

Then I used some of my trusty old shipping tags and a few paper scraps to add a little detail to the inside of the card.  It's not much, but I love the little vintage looking valentine paper.  I used a white gel pen to scribble a little note inside and then off they went!

I also wanted to do a little something for the girls in my community group.  I found these adorable little journals at Target the other day... and they were just $3.99 for a pack of 3 journals.

Then I bought these fun bracelets at Urban Outfitters about 2 weeks ago and thought they would be perfect.  Again... always trying to be thrifty... the bracelets were on sale for $5 for a set of 2... not too shabby.  And they are ridiculously cute... some have little hearts on them, and others have little wishbones.  Adorable.

I tied the bracelets to the journals with some fun ribbon and a little bit of raffia and called it a day.  I added a little love note to each gift and included a verse from Jeremiah 31:3... "I have loved you with an everlasting love; I have drawn you with loving-kindness."  Very appropriate for Valentine's Day, don't you think?? :)

That was pretty much the extent of my handmade Valentine's Day.  I gave the journals to my community group girls last night and I think they were a success.  Thoughtful, yet inexpensive.  I bought Lance a Valentine's Day gift yesterday too... just a little something, but I think he will like it:)  What about you?  Do you get crafty for Valentine's Day this year?

Wednesday, November 7, 2012

project organization :: project life photos

Once upon a time... long, long ago... I decided I wanted to jump on the Project Life bandwagon.  I've always been an avid fan of memory keeping... specifically capturing the everyday moments of life.  I'm really good at taking lots and lots of pictures... but not so great at actually printing my photos and putting them in some type of album.  Enter Project Life.  It's an awesome memory-keeping system designed by Becky Higgins with the purpose of simplifying scrapbooking.  

Only problem??  I'm a tad behind.

Like 7 months behind.

Yeah...

I've been doing a great job of keeping a bunch of shit... ahem... I mean, precious memories.  I've even been doing a pretty decent job of printing my photos... but I haven't gotten much further than that.  See that box in the bottom right corner of the photo above?  Yeah... that's my July and August photos... unopened.   Some might call it hoarding... I call it documenting life:)

Well.  This past weekend I finally decided to tackle the massive pile of photos and stuff.  I opened that box of photos.  I sorted through months and months of memorabilia.  I purged through the bits and scraps of paper.  I separated the photos and stuff as best as I could... by month.
But then my OCD kicked in and I took it a step further.  I separated the bits and pieces by week.  When I actually work on my Project Life album, I document our lives week-by-week.  So, it made the most sense for me to go ahead and separate things into weekly piles.
I folded sheets of paper in half... jotted the week down with a sharpie... and even wrote the exact dates in the upper right corner.  Then, the real fun began.  I tucked all the bits of memorabilia and photos pertaining to each week right inside of the folded sheet of paper.  Then, before you knew it, I went from this...

to this...
Some might call it crazy... I call it progress.  

Now... if only I could make some time to actually sit down and start doing some of this...

Sigh... soon.  Very soon.

Tuesday, August 14, 2012

top 10 :: craftastic project ideas


I've been having crafting withdrawals... like breaking out in a cold sweat and getting the crafting-shakes. It's a serious problem. 

With last month's crazy travel schedule and busy calendar, it's been far too long since I've used scissors or a tape runner... and that is no good, my friends.  I've been daydreaming of all the projects and crafts that I would like to work on... now I've just got to actually make.them.happen.  Here's my top 10 craftastic project ideas...

1) Make a life binder. {image}
(As in, an organize-my-life-binder...)


2) Work on my project life album.
(yes, I am actually still doing this... I'm just 4 months behind, that's all.)


3) Paint something. {image}
(Anything... painting my nails would count at this point.  But that chevron wall is flippin' awesome.)


4) Update my card hoarding project.
(Believe it or not, I've actually started this one.)


5) Mail a care package. {image}
(How adorable is this college student care package??)


6) Create a weekly journal system. {image}
(I've always loved the idea of some type of art journal... now... just have to put that pen to paper...)


7) Write a letter. {image}
(Speaking of pen to paper... an old fashioned greeting is the best kind of greeting.)


8) Plan a party. {image}
(I'm thinking an adorable baby shower for a dear friend...)


9) Make something for the fall. {image}
(Sigh... can't you already smell the cinnamon in the air?) 


10) Do something creative... anything. {image}

What about you??  Any craftastic projects on your to-do list?
Linking up to Many Little Blessings.

Monday, June 25, 2012

how to: diy vintage-looking photos in a jar

Get excited people... because today's how-to post is flipping' awesome.  Heather from Brown Eyed Bell(e) is a genius.  I am totally trying this project soon... this would be perfect for a bridal party or baby shower display.  Be prepared to be amazed!  Take it away Heather...
----------
HI BLACK TAG DIARIES READERS!!
My name is Heather and I blog over at Brown Eyed Bell(e).
I am super excited to be a part of Julia's "How-To" week. Today I will be sharing with you how to put photo's in a jar and make them look a little vintage-y.

***
The supplies are simple, three things, a quart sized mason jar(I used the smooth one, for ball art, from Michaels), oil (I used canola), and a 4X6 picture cut to size, you can use a black and white photo for a more vintage look.
Step 1: cut picture to size if not already done.
Step 2: Insert picture inside Mason Jar
Step 3: Fill with your oil.
Step 4: Optional, add some dried flowers into the oil. Lavender oil anyone?
When it's done it looks kinda 3D to me. I love it and have received many compliments! :)
Pretty easy, eh? If I can do it, you can too!
Thanks again, Julia for having me on your blog today!

Monday, March 5, 2012

cute as a button {monogram, that is}


Before Christmas last year I tried my hand at creating my very first button monogram. I made a "B" for my cousin's sweet new baby girl, Bailey... I used pink and green buttons so it would match her nursery. I loved how it turned out...

I didn't take many "progress" pictures that first time, but I knew I'd make another button monogram soon... so, lucky you... here's a little button monogram tutorial:)

This is such an easy project and probably only takes an hour or so from start to finish. It's the perfect gift... easily customized with colors and obviously the monogram. So far, I've only made these as baby gifts, but how sweet would one of these be for a wedding gift? This one is for a good friend of mine that just had a sweet baby boy last week... baby Jack.

First thing's first... gather up my supplies...
You will need: a printed monogram (I just select my letter of choice in Word, use a super large font, and print it on cardstock), an x-acto knife, scrapbook paper (I like this one that looks like burlap fabric), adhesive, and buttons... obviously.

I used my x-acto knife to basically make my own "J" stencil. I'm still working on my x-acto knife skills... it's harder than it looks, okay.

It worked out pretty nicely, if I do say so myself.

I used my homemade stencil to lightly trace a "J" onto my burlap scrapbook paper.

Here comes the hard part... you have to make an executive decision about button colors. It's tough. I decided to go with blue and green for baby Jack.

I played around with the design and placement for a while, then just used my adhesive to stick them in place. Most scrapbook adhesives will be strong enough to hold the buttons in place, but will allow you to move them around if you change your mind.

It's basically just like a puzzle from here on out... I try to alternate the colors and sizes for a pretty little mix.

And there you have it... a fancy schmancy button monogram.

And if you want to take it up a notch, buy a pretty mat and frame your awesome monogram.

Tah-dah!! Instant high-class. Now I just need a frame... hopefully baby Jack likes blue and green:)

Cute as a button, don't you think?!?

linking this up to the C.R.A.F.T. blog... go check it out... some amazing ideas over there.